Leave Your Message

How to Choose a Car Mounted Transparent Screen?

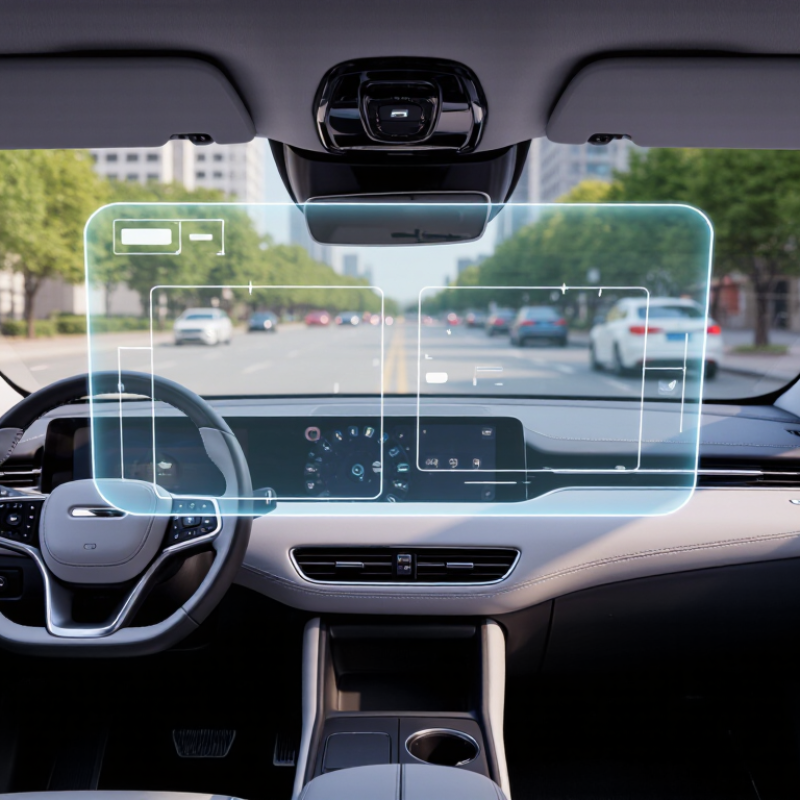
Choosing a Car Mounted Transparent Screen requires more than comparing display size and price. The right model must suit your vehicle, driving habits, and daily environment. A transparent screen may look futuristic, but its value depends on visibility, stability, and thoughtful installation. Bright sunlight can weaken contrast. Dust can expose poor surface protection. Night driving can reveal distracting reflections.

A careful evaluation starts with optical performance. Check brightness, transparency, viewing angle, and readability through the glass. The screen should display information clearly without blocking important road views. Touch response also matters, especially when the cabin is cold or exposed to heat. A reliable product should include clear technical specifications, tested power requirements, and practical instructions. Heat management deserves attention. A screen mounted near a windshield can face strong sunlight for hours.

Installation quality is equally important. Loose cables, weak adhesive, or poor positioning can create noise and safety concerns. Experienced installers usually test the screen while parked before final placement. They also check whether the device interferes with airbags, controls, or the driver’s natural sightline. Local vehicle rules and manufacturer guidance should be reviewed before installation.

No screen is perfect. Some models offer excellent transparency but limited brightness. Others look sharp but consume more power than expected. I would not trust attractive images alone. Compare independent reviews, warranty terms, software support, and return policies. A sensible decision balances appearance with dependable performance. The best Car Mounted Transparent Screen should feel useful, unobtrusive, and secure throughout ordinary journeys, not merely impressive during a showroom demonstration.
How to Choose a Car Mounted Transparent Screen?

Understanding Car-Mounted Transparent Screen Technology

Choosing a car-mounted transparent screen starts with understanding its display technology. Transparent OLED creates light from each pixel, while projection systems reflect images onto a clear combiner. OLED can look sharper, but projection often handles sunlight better. The difference matters at noon.

A screen should maintain readable contrast across bright streets, tunnels, and rainy glass. Check measured brightness, transparency, response time, viewing angle, and operating temperature. A 2024 Automotive HUD Market report by MarketsandMarkets forecasts double-digit growth through 2028. Omdia’s 2024 display forecast also identifies automotive applications as a fast-growing OLED segment. These figures suggest stronger demand, but they do not guarantee better visibility.

During evaluation, place the screen behind the wheel and inspect it from normal eye height. Look for ghosting around white text. Test navigation arrows against trees, headlights, and grey skies. SAE guidance on driver-vehicle interfaces emphasizes limiting visual distraction, so essential information should remain brief and stable. Avoid systems that cover pedestrians or road signs. Installation quality matters too. Poor alignment can create double images after vibration. I would not trust a showroom demonstration alone. A screen may appear excellent indoors, yet fail under direct sunlight. Measure it in real conditions, then question the result.
Identifying Your Vehicle’s Display Needs and Use Cases

How to Choose a Car Mounted Transparent Screen?

Identifying Your Vehicle’s Display Needs and Use Cases

Start by identifying what the driver must see without looking down. Navigation arrows, speed warnings, parking-camera views, and battery information serve different needs. A delivery driver may need frequent route changes, while a family driver may prefer simple navigation prompts. Do not choose a screen only because it looks futuristic.

Check the vehicle’s dashboard shape, windshield angle, and available power connection. A practical test is useful: sit in the driving position and observe the screen during daylight, at night, and under direct sunlight. Glare can make a clear display difficult to read. It should not block road signs, mirrors, or the driver’s normal view. Local vehicle regulations also matter, since mounting positions and display functions may be restricted.

Consider brightness control, viewing angle, temperature resistance, and stable mounting. A loose bracket can vibrate over rough roads. Touch controls may seem convenient, but voice or steering controls can reduce distraction. The screen should work with the vehicle’s navigation and data systems without demanding complicated setup. Keep personal information protected when connecting a phone or vehicle account.

A small mistake is easy to miss. I once underestimated how distracting changing colors could become during night driving. Testing real routes is better than trusting a product image. Ask whether the display remains useful after several weeks, not just during the first drive.

How to Choose a Car Mounted Transparent Screen? - Identifying Your Vehicle’s Display Needs and Use Cases

Vehicle Display Need Recommended Mounting Area Suitable Screen Size Recommended Brightness Transparency Target Best Use Cases Key Selection Considerations
Driver navigation and safety alerts Lower windshield area or dashboard-mounted transparent panel, outside the primary road-view zone 5–8 inches diagonal 800–1,500 nits for daytime readability At least 70% Turn-by-turn directions, speed information, collision warnings, vehicle status Prioritize low visual obstruction, wide viewing angles, anti-glare treatment, and quick access to essential information.
Rear-seat passenger entertainment Behind the front-seat headrest or on a rear cabin partition 10–15 inches diagonal 400–800 nits for controlled cabin lighting 50–70% Streaming media, games, travel information, passenger controls Check viewing distance, seat adjustment range, touch comfort, headphone connectivity, and resistance to vibration.
Commercial passenger information Behind the driver, above the cabin aisle, or on a transparent interior partition 15–24 inches diagonal 600–1,200 nits depending on window exposure 55–75% Route updates, public announcements, accessibility information, emergency instructions Use readable text sizes, high-contrast content, automatic brightness control, and easy maintenance access.
Exterior advertising or promotional display Rear window, side window, or a protected exterior display frame 20–40 inches diagonal, subject to vehicle dimensions 1,500–3,000 nits for direct sunlight conditions 30–60% Short advertisements, fleet identification, public notices, event messaging Confirm local regulations, weather protection, thermal management, impact resistance, and electrical load.
Fleet dispatch and driver communication Dashboard center stack or a secure instrument-panel mount 7–10 inches diagonal 700–1,200 nits 60–75% Job assignments, delivery status, route changes, vehicle diagnostics Select secure wireless connectivity, glove-friendly controls, strong mounting hardware, and a distraction-minimizing interface.
Emergency, service, or utility vehicle display Dashboard, overhead console, or protected rear cabin mount 8–13 inches diagonal 1,000–2,000 nits 50–70% Equipment monitoring, work orders, mapping, camera feeds, operational alerts Look for vibration resistance, a wide operating temperature range, glove-compatible input, and reliable power protection.
Premium cabin ambience and interactive controls Center console, side partition, door panel, or rear passenger divider 8–15 inches diagonal 300–700 nits 65–85% Climate control, lighting scenes, seat functions, cabin information Emphasize optical clarity, slim construction, low heat output, silent operation, and integration with the vehicle interior.
Camera and parking assistance Dashboard or center console within the driver’s natural sightline 7–12 inches diagonal 800–1,500 nits 60–80% Rear camera view, side camera view, parking guidance, blind-spot monitoring Choose high contrast, low latency, accurate color reproduction, and a mounting position that does not block mirrors or road visibility.
Selection note: The recommended specifications are practical starting ranges. Final requirements should be verified against the vehicle’s available mounting space, electrical system, climate conditions, driver-visibility rules, local regulations, and the intended viewing distance.

Comparing Screen Types, Sizes, Visibility, and Image Quality

Choosing a car-mounted transparent screen starts with the display type. Transparent OLED panels deliver rich colors and deep blacks, but strong sunlight can reduce readability. Projection combiners often look natural because graphics appear beyond the glass. However, their image may fade under harsh daylight. Transparent LED panels can provide higher brightness, although visible pixels may become distracting at close range. I have found that showroom demonstrations can be misleading. Road lighting changes everything.

Size should match the driver’s viewing distance, not the dashboard’s available space. A large screen is not automatically better. It may increase eye movement and hide important surroundings. Check the image from the normal seating position, then test it with sunglasses. Brightness, contrast, viewing angle, and refresh rate deserve equal attention. Text should remain sharp when the vehicle moves over uneven roads. Low latency matters too. Delayed graphics feel unstable.

Test it at noon and after sunset. Dark graphics can disappear against trees, while white graphics may glare against headlights. A practical screen needs adjustable brightness and clear controls. Resolution affects fine maps, but contrast often affects real-world visibility more. Screen transparency can also reduce color depth, especially over bright backgrounds. That compromise is easy to overlook. Choose a certified installation method, and confirm local visibility and vehicle-equipment requirements before fitting it.

How to Choose a Car Mounted Transparent Screen?

Comparing screen types, sizes, visibility, and image quality

Scores use a 1–10 comparative scale based on typical technical characteristics. Projection HUD systems generally provide the best daylight visibility and transparency, transparent OLED offers the strongest image quality, while transparent LED film provides the greatest flexibility for large or curved installations. Actual performance varies with ambient light, viewing angle, screen size, and installation position.

Evaluating Installation Methods, Compatibility, and Safety Features

How to Choose a Car Mounted Transparent Screen?

Installation quality determines more than appearance. A dashboard mount is usually easier to remove, while a windshield mount offers better viewing alignment. Check the clamp pressure, cable routing, and emergency airbag zones before fitting. A loose bracket can vibrate over rough roads. It can also become a projectile during sudden braking.

Compatibility needs a practical inspection. Confirm the vehicle’s power range, connector type, available dashboard space, and operating temperature. Some screens depend on GPS, USB, or vehicle data connections. Do not assume every interface works with every model. A workshop should test brightness, glare, steering-wheel visibility, and screen stability in daylight. Reflections matter. The Insurance Institute for Highway Safety identifies glare and visual distraction as important safety concerns in vehicle design. NHTSA recorded 3,522 deaths in distraction-affected crashes in 2021, showing why placement requires restraint.

Safety features should support driving, not compete with it. Choose automatic brightness control, anti-glare treatment, voice operation, and a clear emergency shutoff. Avoid displays that encourage frequent touch input. The AAA Foundation for Traffic Safety found that visual-manual tasks can substantially increase driver workload, even when traffic seems light. Local rules may also restrict windshield-mounted equipment or illuminated content. Check them before installation. Even careful installers miss small reflections. Recheck the screen after sunset, rain, and a week of normal driving.

(Sources: NHTSA, Traffic Safety Facts 2021; IIHS, Vehicle Design and Safety Research; AAA Foundation for Traffic Safety.)

Checking Durability, Connectivity, Power Requirements, and Cost

Choosing a car-mounted transparent screen requires more than checking brightness. Durability comes first. Look for published results from ISO 16750 environmental testing, including vibration, temperature cycling, humidity, and chemical exposure. A screen that survives a showroom may fail after summer heat reaches the dashboard. The U.S. Department of Energy reports that parked vehicles can become dangerously hot within minutes, so thermal ratings matter. I would also inspect the mount, cable strain relief, and glare performance. Clear glass is not automatically safer.

Connectivity should match real driving conditions. Select systems supporting stable Bluetooth, wired smartphone links, and fast reconnection after engine startup. The GSMA Mobile Economy 2024 report estimates that 5G connections will exceed 2 billion globally by 2025, but coverage remains uneven on rural roads. Do not pay for features your route cannot use. Power demand is equally important. Confirm the required voltage, peak current, standby draw, and fuse protection. The USB Implementers Forum allows much higher power through modern USB-C standards, yet the vehicle socket may not support the advertised output. Test it with navigation, audio, and maximum brightness together.

Tips: Compare total cost, not only the display price. Include installation, adapters, replacement mounts, and warranty coverage. Ask for measured power data, not vague “low consumption” claims. A lower-cost unit may be sensible, but I would question any supplier refusing durability reports. My judgment can be wrong here: a costly panel may still have weak software support. Check update history and return terms before installation.